All activities should be supervised by an adult. As an Amazon Associate, I earn from qualifying purchases. This post may contain affiliate links.
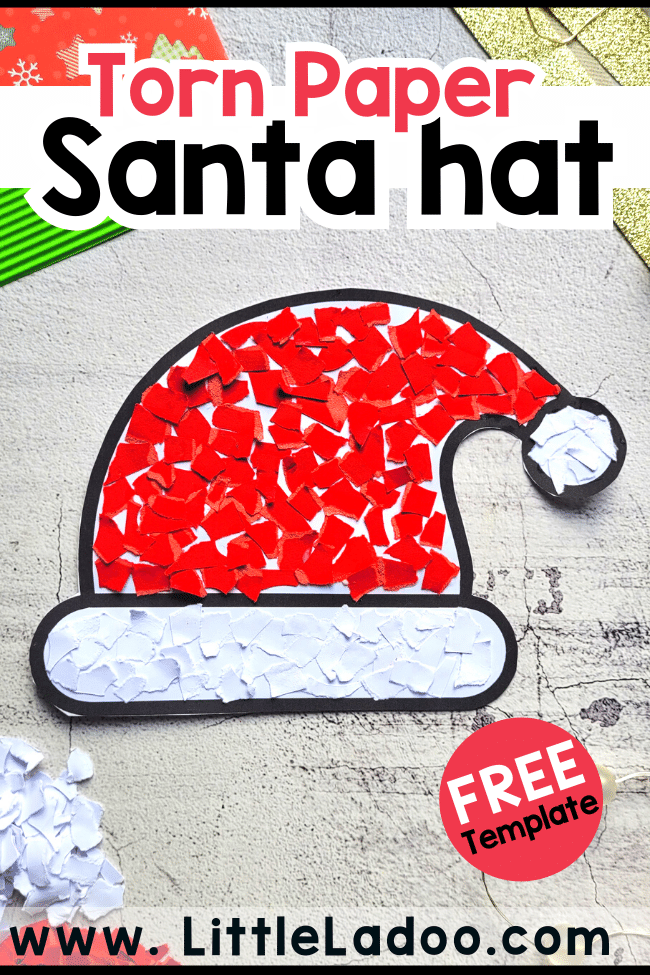
Join us in tearing, crafting, and spreading joy with a unique Torn Paper Santa hat that captures the essence of Christmas.
Perfect for crafters of all levels, this budget-friendly project promises to infuse your space with merriment.
Let the holiday crafting begin!
Things you need to make the Torn Paper Santa Hat
Directions to make the Torn Paper Santa hat
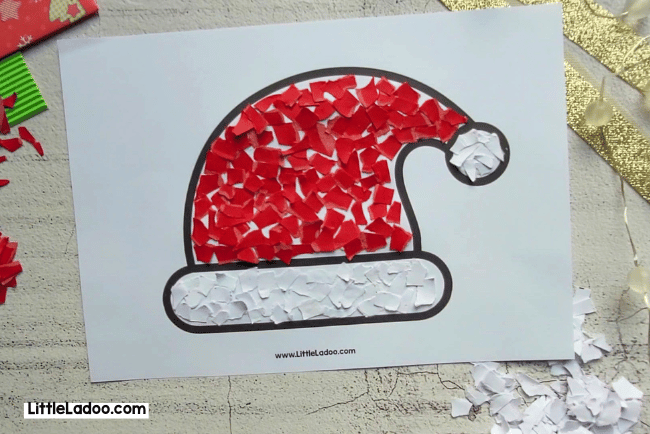
Begin by tearing Cardstock paper into small bits (approx 1 cm) for the torn paper craft. We opted for Cardstock paper due to its thickness, providing a lovely texture at the torn edges.
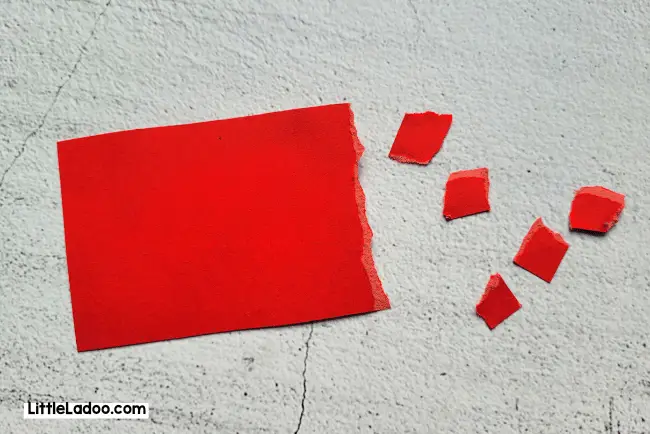
We always utilize paper scraps from previous craft projects, offering a sustainable way to repurpose household waste papers.
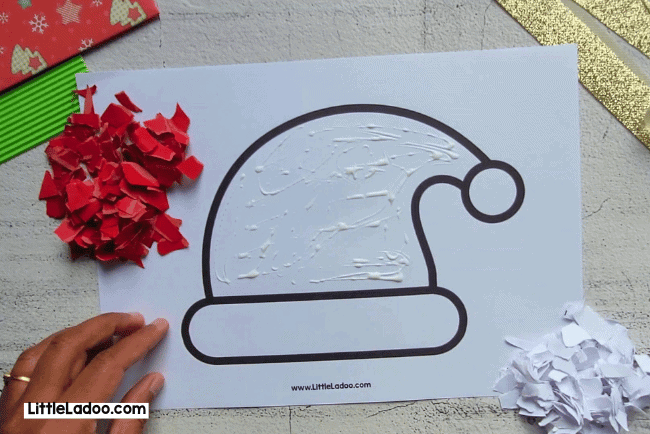
Next, Download and print the Santa hat Template onto sturdy paper and organize the torn papers you’ve prepared—just a handful of White and Red colours will suffice.
Apply glue to the designated area for the red section.
Begin sticking the pieces one by one, ensuring the entire region is covered in red.
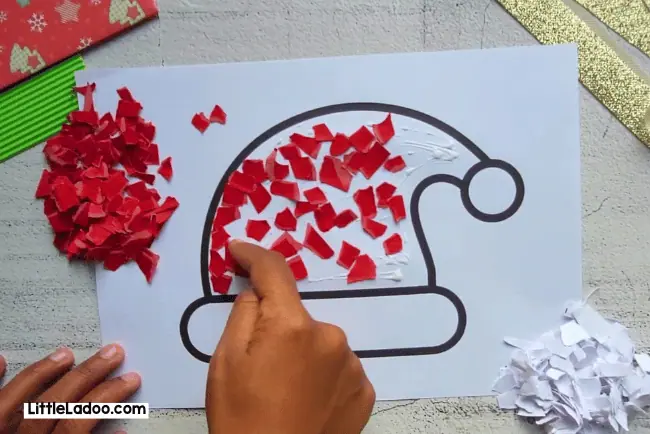
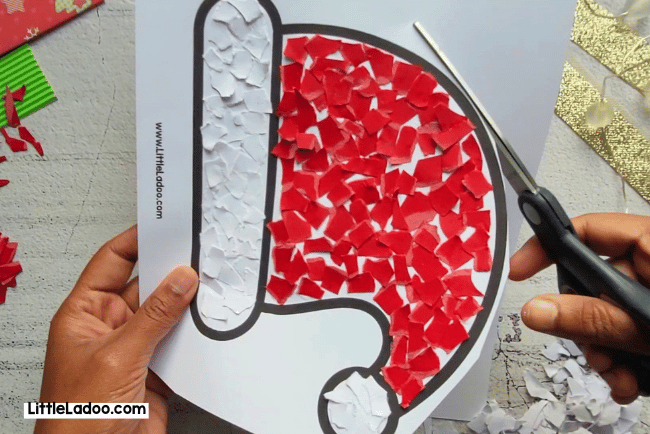
Once the red section is complete, repeat the process for the white-torn papers.
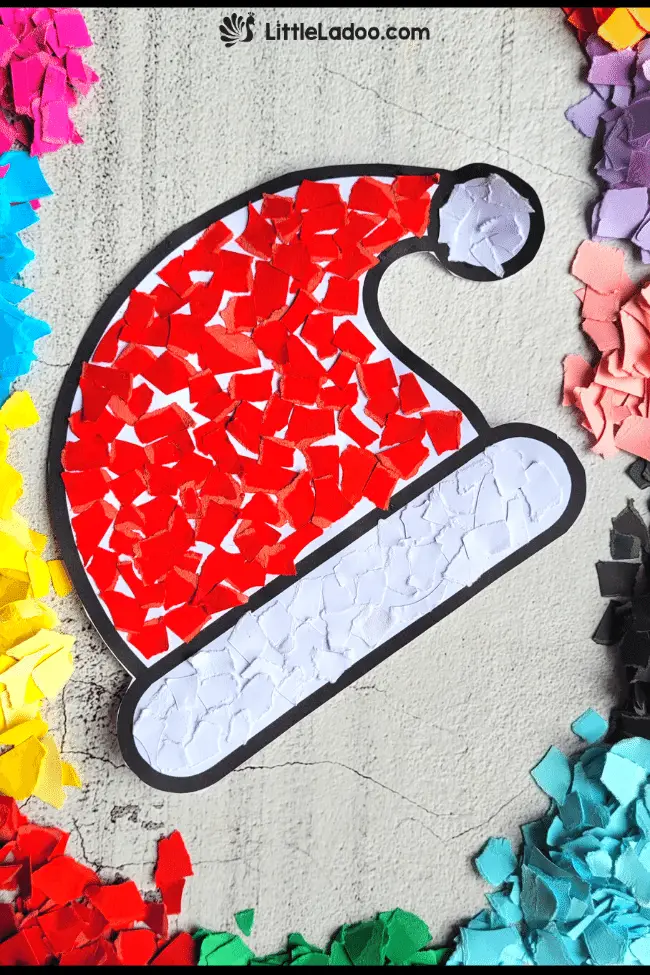
Once the glue has dried, proceed to cut out the hat.
There you have it—the Santa hat! It’s one of the simplest and most adorable crafts you can create.

Simply attach a strip of paper on either side to make a headband!
Explore Christmas Crafts for kids
More Torn Paper Crafts for kids
Download the Santa Hat Template
Ready to print the Santa hat template for your crafting adventure? Visit the Free Christmas Template blog to download not only the Santa hat template but also 6 other Christmas templates.