All activities should be supervised by an adult. As an Amazon Associate, I earn from qualifying purchases. This post may contain affiliate links.
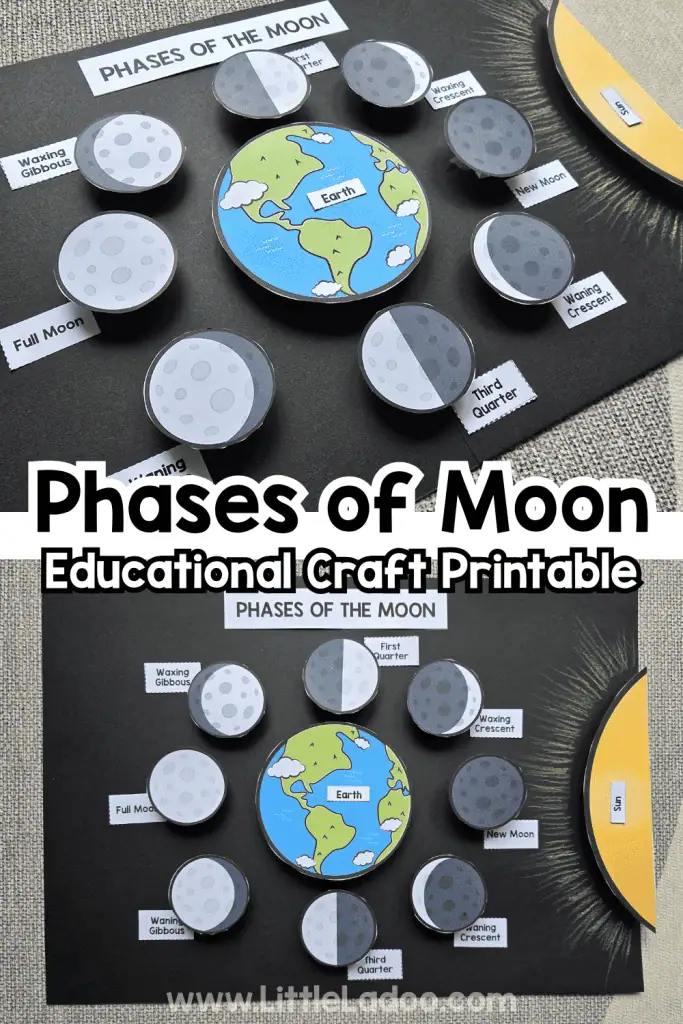
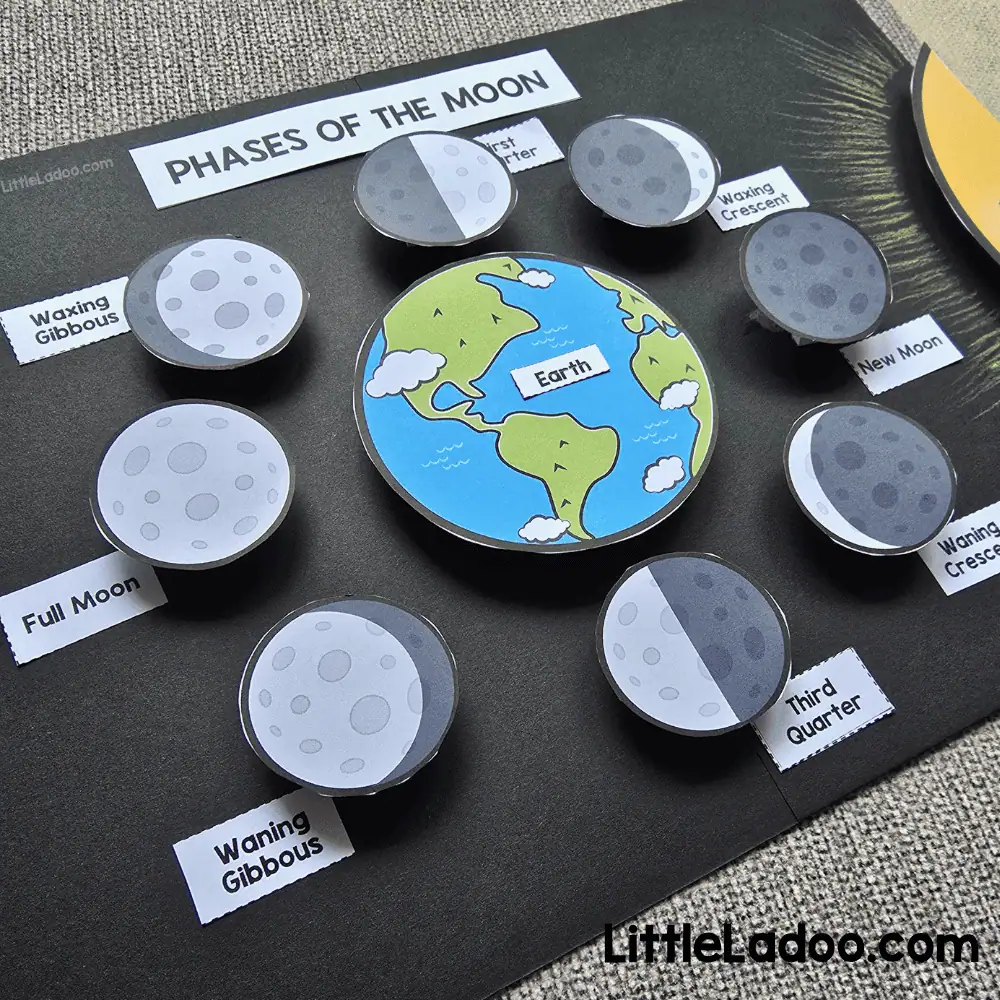
Learning about the moon is even more exciting when kids can build the moon cycle themselves! This Phases of the Moon Craft turns a space science lesson into a fun, hands-on activity where children can cut, arrange, label, and display the different phases of the moon.
The finished project creates a 3D-style moon phases display, making it a fun addition to a space unit, science centre, homeschool lesson, or classroom bulletin board.
A Hands-On Space Science Craft
The moon may appear to change shape throughout the month, but it isn’t changing shape. As the moon orbits Earth, we see different amounts of its sunlit side. These changing views are what we call the phases of the moon.
This craft gives children a visual way to explore the eight main phases:
New Moon → Waxing Crescent → First Quarter → Waxing Gibbous → Full Moon → Waning Gibbous → Third Quarter → Waning Crescent
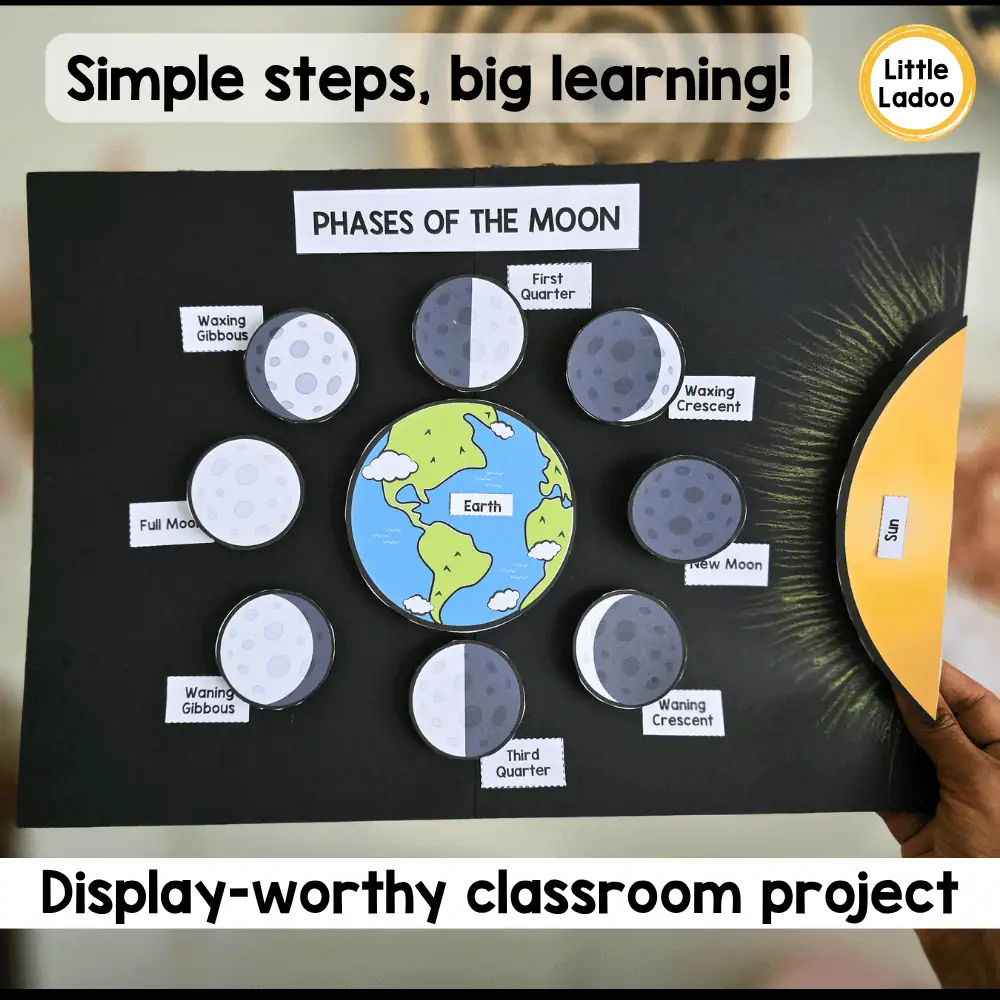
As children arrange the phases around Earth, they can practice sequencing, science vocabulary, observation, and fine motor skills while creating something they can proudly display.
Things You’ll Need
- Phases of the Moon Craft Printable
- Cardstock or thick printing paper
- Two Black A4 sheets for the background
- Scissors
- Glue
- Crayons or colouring supplies
- Optional: foam adhesive squares
For younger children, you may want to help with some of the cutting or prepare the smaller pieces ahead of time.
Watch Video Tutorial
How to Make the Phases of the Moon Craft
1. Print the craft.
Print the pages onto cardstock or thick paper. Choose the colour version for a quick activity or let children decorate the black-and-white version themselves.
2. Cut out the pieces.
Cut out the Sun, Earth, eight moon phases, labels, and paper square templates.
3. Make the paper squares.
Follow the included instructions to fold and glue the paper strips into small squares.
4. Prepare the background.
Join two A4 sheets together along their longer edges to create a larger background. Black paper works especially well for creating a night-sky effect.
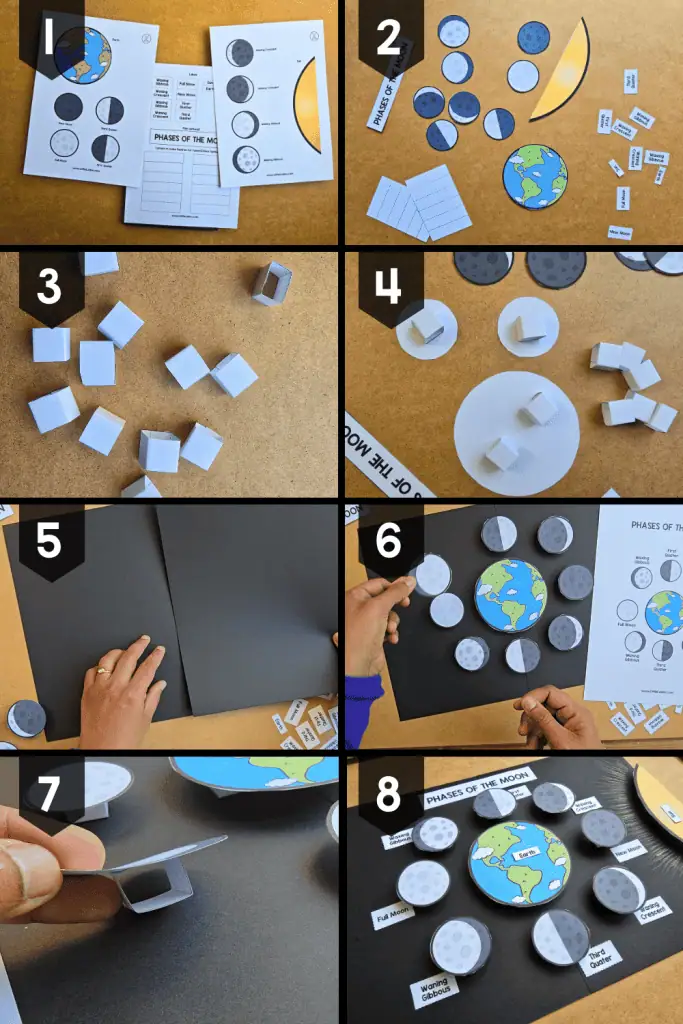
5. Add the Sun and Earth.
Attach the paper squares to the back of the Sun and Earth. Apply glue to the squares and press the pieces onto the background using the reference sheet as a guide.
These raise the pieces from the background and give the finished craft its fun 3D effect.
6. Arrange and paste the moon phases.
Place the eight moon phases around Earth in the correct sequence. Leave enough room beside each moon for its label. Then paste the pieces.
7. Add the labels.
Match and stick the correct label beside each moon phase.
8. Finish your space scene!
Kids can add stars, draw sun rays, or splatter a little white paint over a dark background to create a starry sky.
Turn the Craft Into a Learning Activity
The learning doesn’t have to stop when the craft is finished. Use the completed moon cycle as a visual reference and ask questions such as:
- What phase comes after the New Moon?
- What phase comes before the Full Moon?
- Can you find the waxing phases?
- Can you find the waning phases?
- Can you name all eight phases in order?
You can also encourage children to observe the real moon at night and compare what they see with their completed craft.
Easy Craft Variations
Want to simplify the activity? Replace the handmade paper squares with foam adhesive squares for a quicker assembly option.
For a larger classroom display, use poster-size paper and spread the moon phases farther apart. You could even have different students create individual phases and turn the project into a collaborative classroom display.
Get the Phases of the Moon Craft Printable
Ready to try it with your little scientists?
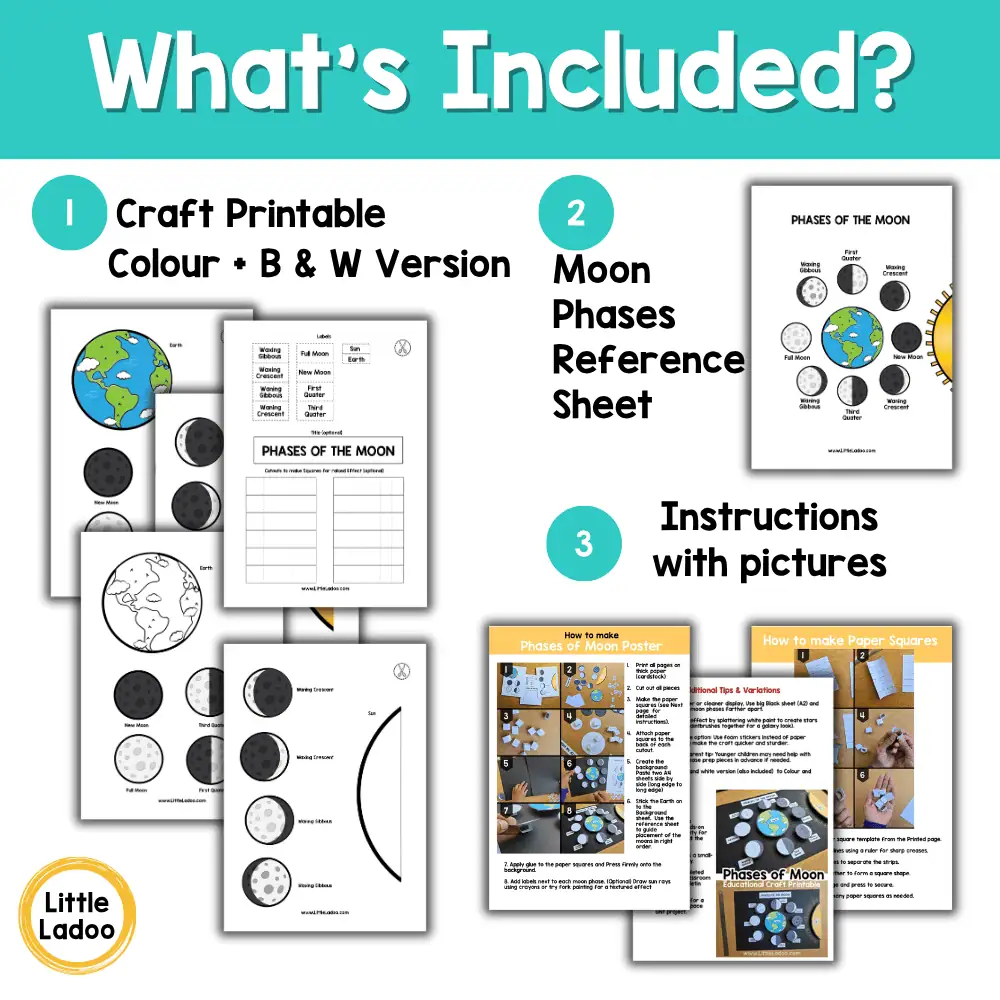
The Phases of the Moon Craft Printable includes colour and black-and-white craft pieces, moon phase labels, a reference sheet, paper square templates, step-by-step photo instructions, and a bonus learning reflection activity.
Perfect for kindergarten, first grade, second grade, homeschool science, space units, science centres, and classroom displays.
More Science Crafts for kids
- Learn the Order of Planets with the Solar System Craft for kids
- Learn the Continents of the World with the Continents Craft
- Learn the Life Cycle of an Apple with an Interactive Foldable
- Learn the 7 Major Internal Organs with this Anatomy Craft Printable

