
All activities should be supervised by an adult. As an Amazon Associate, I earn from qualifying purchases. This post may contain affiliate links.
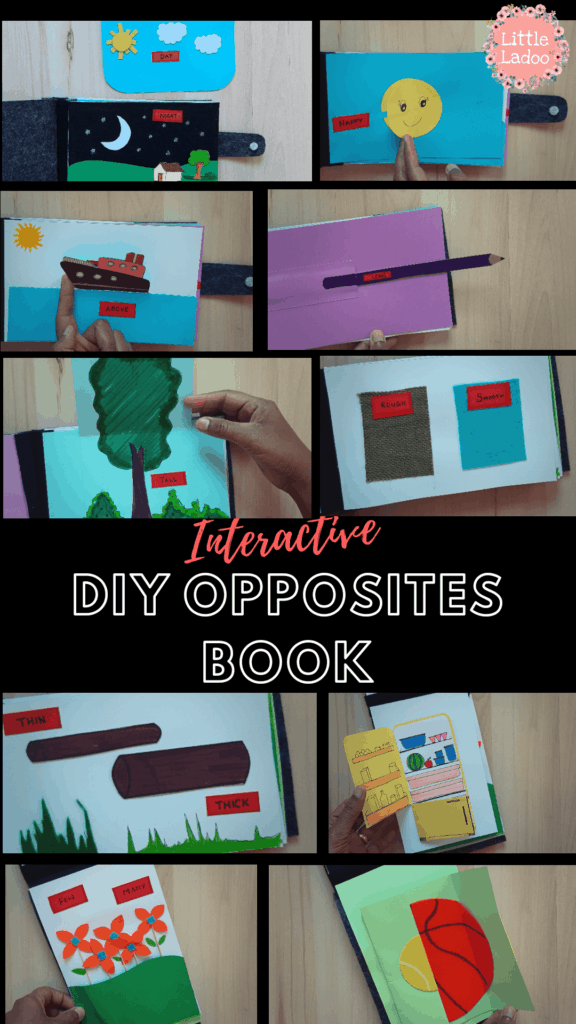
I made this opposite book for my 2-year-old girl to learn opposites. It is fun to flip through and interact with the pages. Have a glimpse of all the pages here in this video.
It has 10 pages and each page has flaps to lift.
Many people wanted more details on how to make this book. Unfortunately, I did not click any pics while making the book. I have written a brief on things needed and how to assemble the pages. So read on to learn more.
I will be definitely making a video tutorial next time when I make a book like this.
Things needed:
(affiliate links included for convenience)
- Cardstock sheets
- Fine tip pen
- Brush pens
- Paper glue stick
- 1 mm felt
- Velcro
- Hot glue gun
How I made this DIY opposite book:
The pages in the book are A5 size cardstock sheets.
Planning:
Initially, I made a list of opposites and drew a rough sketch of each page. I also planned how the flaps will be opening.
Drawing the pages:
I used a fine tip black pen and brush pens to make the drawings on the pages and the flaps.
The paper flaps are glued to the base sheet with a paper glue stick.
So this is the list of opposites cards that I made.
- Day x Night
- Happy x sad
- Above x Below
- Short x Long
- Short x Tall
- Thick x Thin
- Rough x smooth
- Opened x closed
- Few x Many
- Small x Big
Binding the pages:
Once the pages were ready, I made 10 strips of felt of sizes 3cm x 14cm. Glued them to the short side of each page and finally glued all the felt one above the other.
In fact, the main reason for using felt is to flip the pages with ease. If you do not have felt, You can staple the pages together. Just make sure you leave extra space for binding.
Preparing the cover:
And finally, the cover of the book. I made the cover with a 2mm thick Grey felt and made the closure with velcro. Completed this book by adding a title and some patterns on the cover page.
It’s ready!
My kid loved this flip-flap book! I hope you too love this idea!
Let me know your thoughts in the comment section. I would love to hear from you:)
Last year, I made an interactive opposite board with baby wipes lids. You can check it here.
Also, have a look at print and playbooks on my Youtube channel