All activities should be supervised by an adult. As an Amazon Associate, I earn from qualifying purchases. This post may contain affiliate links.
Making a Neighbourhood map for kids can be a fun activity that helps children learn about their local community and develop their spatial reasoning skills.
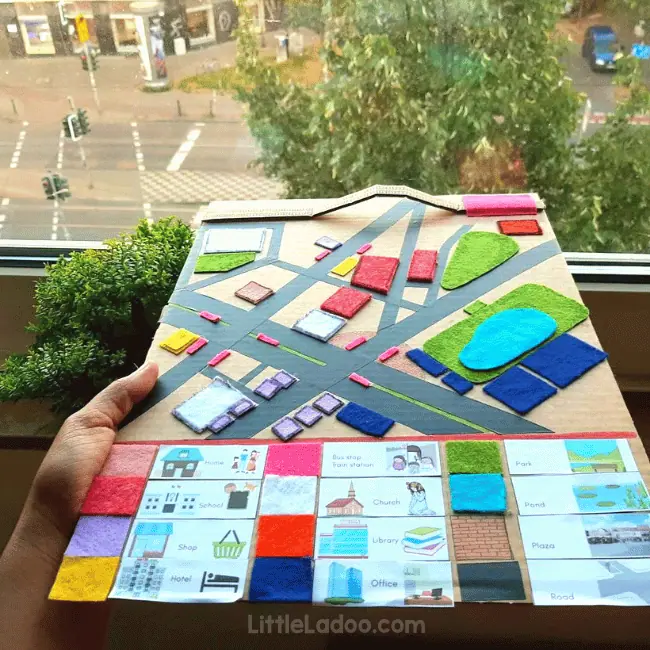
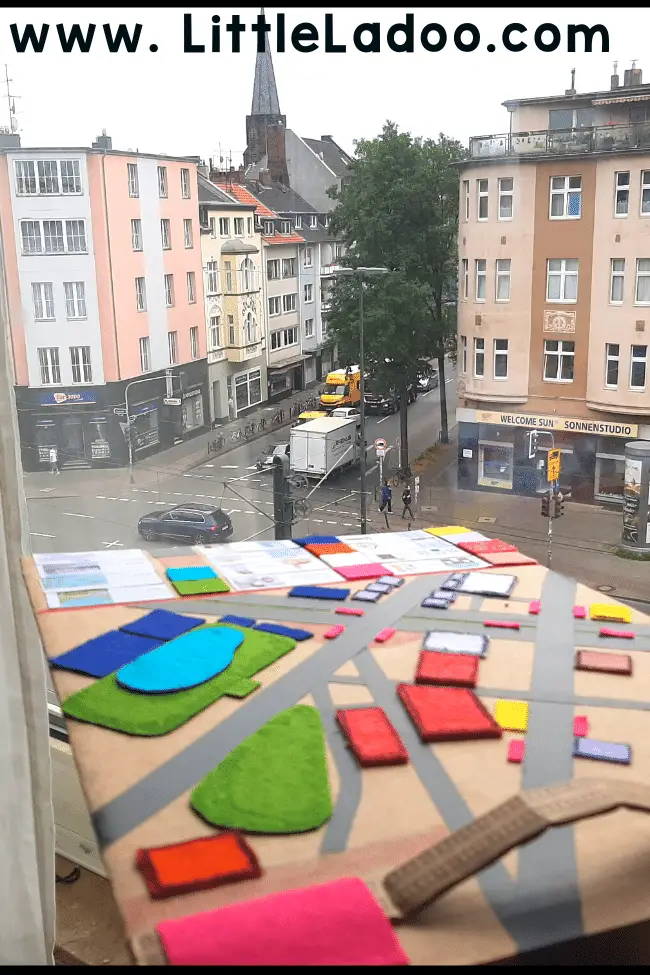
A few years ago, I created this cardboard Map for my preschooler. If your child is older, you can make it a fun and educational experience by involving them in the process of making the map.
In this blog, we will explore the steps involved in creating a neighbourhood map for kids, including how to gather information, choose a map style, and add important features such as landmarks, streets, and buildings.
Why a Simplified Map is Perfect for kids?
Regular maps usually contain intricate details and a vast amount of geographic information, making them challenging for children to comprehend.
In contrast, simplified maps for kids are created to be easily understood and navigated, with an emphasis on fundamental spatial relationships and essential landmarks.
These Simple maps often use bright colours, simple symbols, and clear labels to make it easier for young children to comprehend the information. Here are some benefits of using a simplified map for kids
- Helps with spatial reasoning.
- Teaches Basic navigation skills.
- Helps with basic concepts of geography, such as direction, distance, and location.
- Encourages Curiosity and Exploration.

By using a simplified map that is easy to understand, kids can feel empowered to learn more about the places they visit.
How to make this Neighbourhood Map?
Things you will need
- Cardboard sheet of preferred size
- Black Insulation Tape
- Felt sheets or coloured paper
- Tools: Cutter, Pencil, Hot glue gun, scissors
You might also like – How to teach Kids the Continents of the word?
Directions
Choose the Area to Represent
The initial stage involves determining the boundary of the map that we aim to generate. My preference was to cover a 500-meter radius around our residence. You may utilize Google Maps as a guide to outlining the primary roads and streets within your locality.
Mark the Important Places and Landmarks
There could be numerous structures within the designated boundary. However, for ease of comprehension, it is advisable to choose only significant areas and landmarks for the child-friendly map.
For example, I have included the following landmarks:
- Our residence
- Streets and roads
- Parks and recreational areas
- Bodies of water
- Library
- Stores and shops
- Church or place of worship
- School or educational institution
- Office or workplace
- Bus stop or train station
- Hotel or lodging
- Plaza or public square
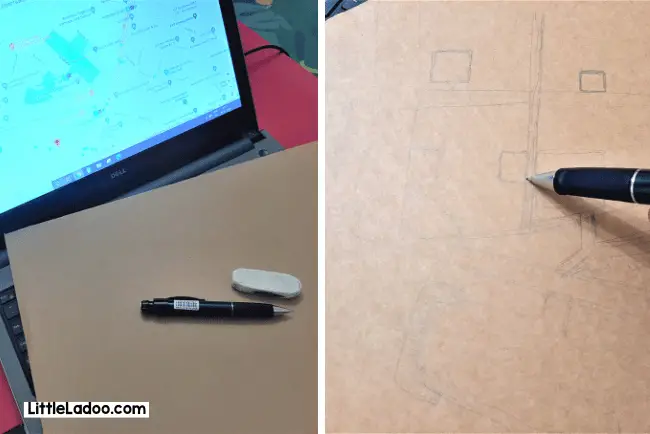
I have roughly outlined the perimeter of these locations on the cardboard sheet. It is essential to maintain their proportional representation with regard to one another by referring to Google Maps.
There could be numerous structures within the designated boundary. However, for ease of comprehension, it is advisable to choose only significant areas and landmarks for the child-friendly map.
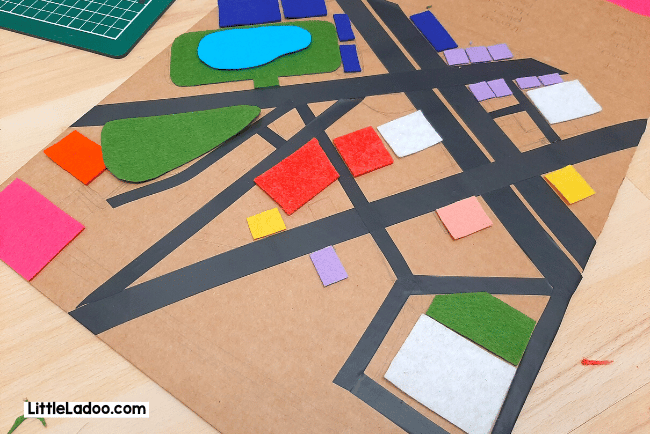
Create the Roads
Using black insulation tape is a quick and convenient way to mark the roads. Cutting the tape in half along the length to create a narrow road. This will help differentiate between narrow and wide roads, making it easier to read the map.
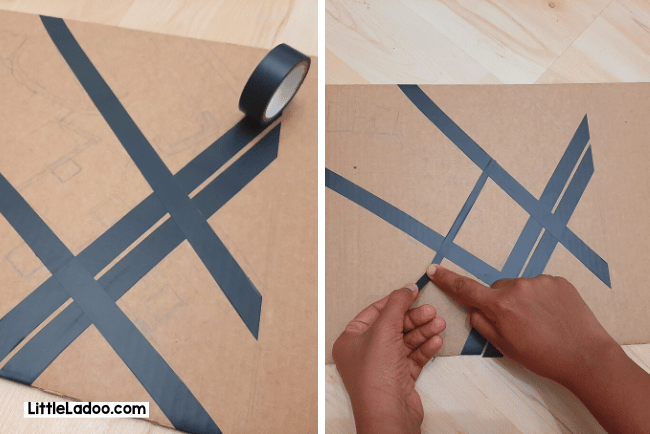
Creating a road network with black markers is also a great option. Additionally, you can add arrows to show the direction of traffic flow.
Whichever method you choose, it’s essential to ensure that the roads are accurately represented and easily recognizable on the map.
Add Buildings
To create the buildings/places on the map, cut out patches of felt sheet or coloured paper and attach them to the cardboard using a hot glue gun.
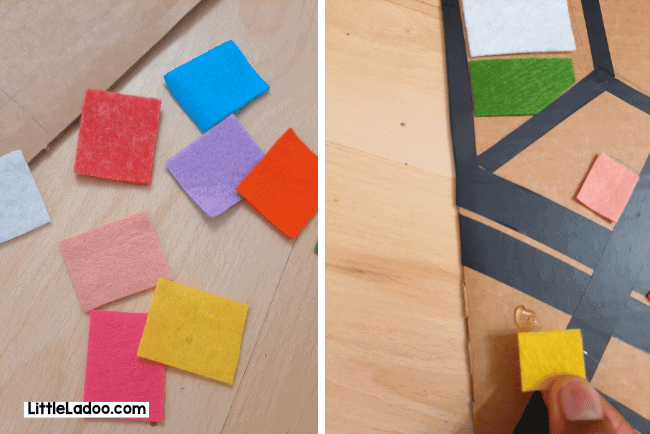
It is recommended to use a distinct colour for each type of building to make them easily distinguishable. To enhance the visibility of light-coloured patches, consider adding a black outline around them.
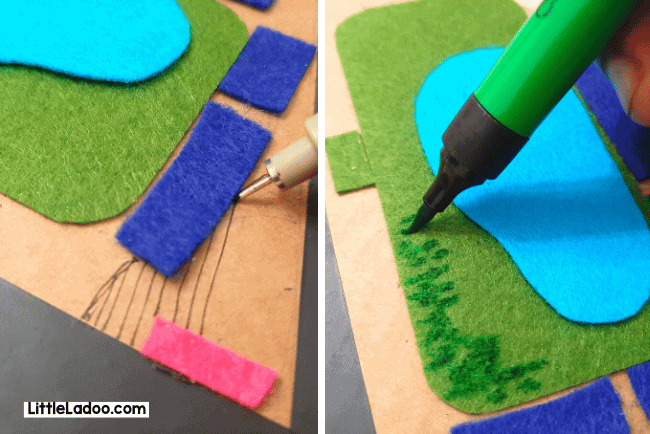
Add Other Features/Landmarks
Apart from the buildings/places, other notable features can also be added to the map.

For instance, there is a railway bridge tunnel that we frequently pass through. We added this by folding a long strip of cardboard and attaching it over the road.
Parks and plazas can be adorned with additional details using marker pens. This will help distinguish them from other locations and make them stand out on the map.
Make a Map Legend
The map legend, also known as the map key, is a crucial component of the map. It helps the user understand the symbols and colours used to represent the various features on the map.
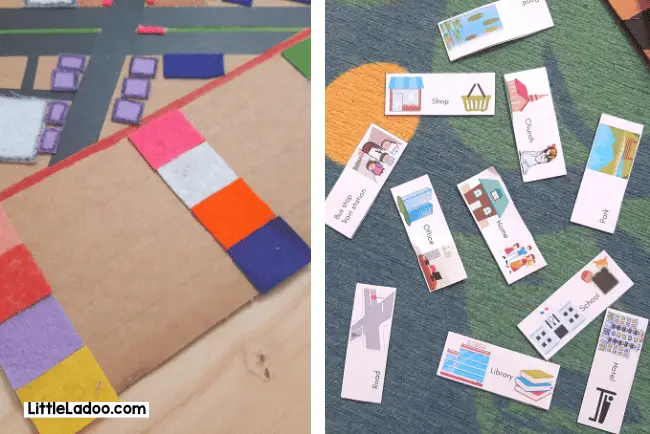
To create the legend, start by cutting out the felt pieces and attaching them using a hot glue gun. Next, use PowerPoint to create vector images of the buildings/places, print them out, and cut them to size. Then, paste them next to their corresponding colour on the map legend.
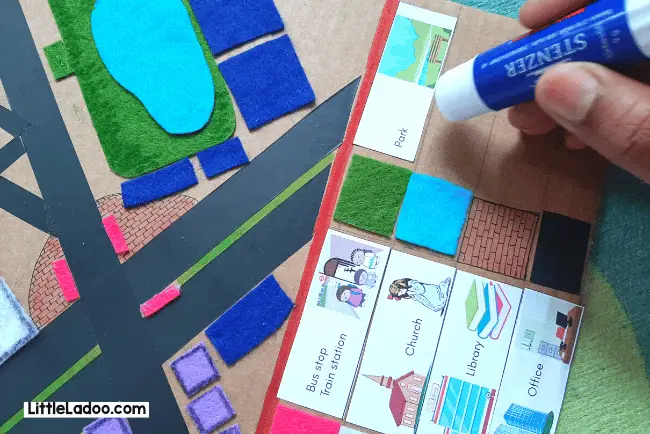
This pictorial representation is particularly helpful for children who are not yet able to read. Once the legend is complete, the map is ready to use!
How to use this Neighbourhood Map for kids?
Teaching toddlers about maps can be a fun and interactive experience. Here are some suggestions for teaching maps to toddlers:
- Start with your home: Show your toddler where your home is on the map and point out familiar landmarks such as parks, schools, or shops.
- Show the pictures of Landmarks: Use visual aids such as pictures or illustrations to help your toddler understand the map. For example, you can show them a picture of a park and then point it out on the map.
- Play games: Turn map learning into a game by playing “I Spy” with the map. Ask your child to find specific landmarks or features on the map.
- Go on a scavenger hunt: Create a scavenger hunt using the map. Give your toddler a list of landmarks to find on the map, and then have them find them in real life.
- Find ways: Ask your child to show the route to reach a Destination on the map. Ask them to trace the route from the starting point to the destination, following the streets and landmarks on the map. Encourage your child to use spatial language such as “left,” “right,” “up,” and “down” to describe the route.
- Ask Questions: Here are a few examples: Where is the supermarket? What’s that big red building? How to go to church from our home? How many parks are there around our house?
- Take it when you go out so that kids can navigate with the map.
Remember, keep it fun and engaging, and your child will be more likely to retain what they learn about maps.
I hope that this blog post has been helpful and informative for you. Creating a neighbourhood map for your child can be a wonderful way to engage them in learning about their community and developing important skills. By following the steps outlined in this post, you can create a fun and educational experience for both you and your child.
You might also like some of these Projects that we made using Cardboard
Check out how we made a DIY Musical Instrument from cardboard or other materials commonly found around the house.
You might also like our Front facing Cardboard bookshelf that can hold up to 40 Books
This Shoebox Kitchen is a fantastic idea if you are looking for an inexpensive and Easy DIY