
All activities should be supervised by an adult. As an Amazon Associate, I earn from qualifying purchases. This post may contain affiliate links.
How to Make an Adorable Play Kitchen for Kids Using a Shoebox
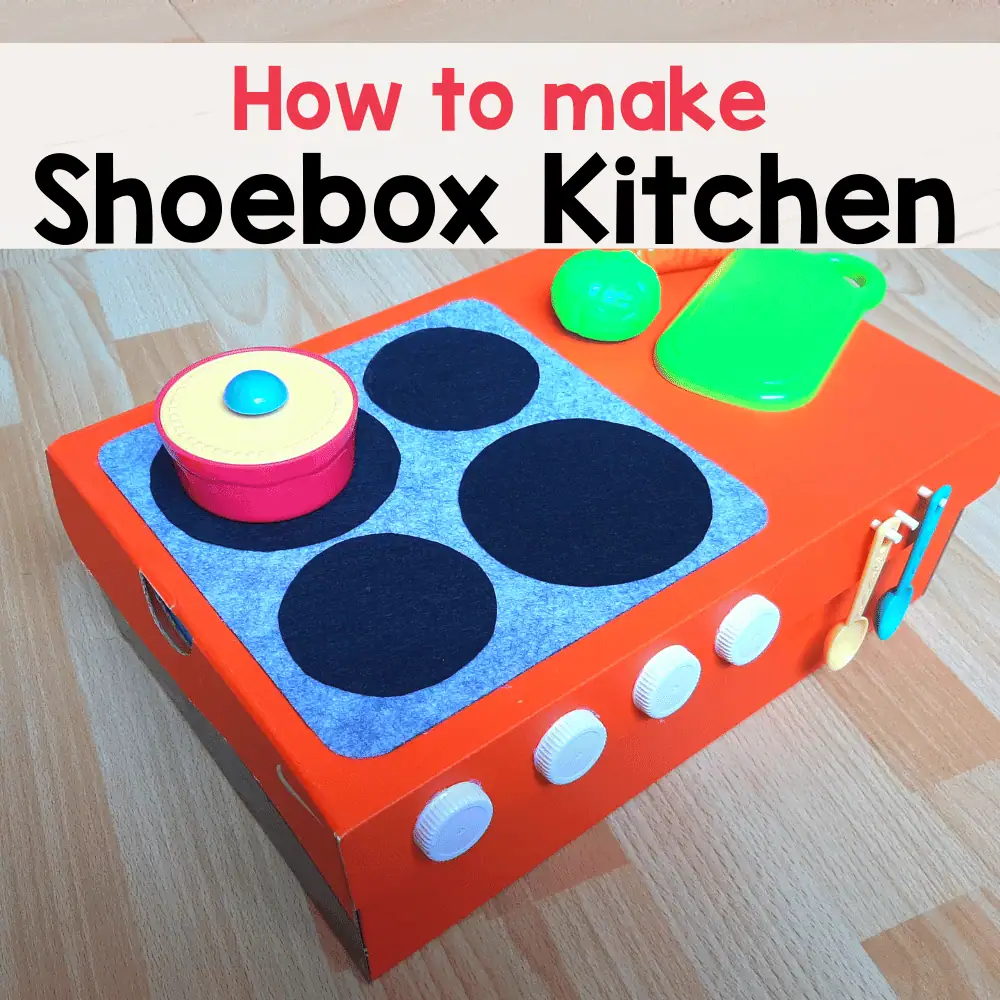
Looking for a fun and budget-friendly DIY Kitchen Toy for your child? This mini cardboard play kitchen is a quick and delightful weekend craft that sparks hours of imaginative play!
With just a shoebox and a few craft supplies, you can create a compact play kitchen that your toddler will love.
It’s perfect for small spaces, takes just 15 minutes to make, and costs next to nothing—what’s not to love?
Why Make a DIY Cardboard Play Kitchen?
Sure, there are lots of gorgeous play kitchens on the market (IKEA’s DUKTIG is a favorite of mine!). But if you’re tight on space—or simply want to test the waters before making a bigger investment—this DIY shoebox kitchen is the perfect solution.
That’s exactly why I made one for my daughter. We were delaying buying a larger kitchen set due to space constraints, so I crafted this mini version.
And guess what? She loved it! She spent hours “cooking” meals for her stuffed animals and pretending to be our family chef.

The Mini kitchen also has inner compartments to store all the kitchen accessories. Can you believe all the items in the picture below can be organised in the box?

Perks of Cardboard Toys:
- Budget-friendly: Make it from materials you already have at home.
- Customizable: Personalise it to suit your child’s interests.
- Compact & Storable: Easy to tuck away when not in use.
And of course, A great way to recycle cardboard and reduce landfill waste.
How to Make a Cardboard Play Kitchen
Materials You’ll Need
To make this play kitchen, here’s what you’ll need:
- 1 medium-sized shoebox (preferably plain on the outside)
- 1 grey felt sheet (or construction paper)
- 1 black felt sheet (or black paper)
- 4 milk carton caps (for stove knobs)
- Cardboard strips (for inner compartments)
- Hot glue gun
- Scissors
- Wooden skewers (for hanging utensils)
- Optional: paint, stickers, washi tape
Step-by-Step Instructions
- Cut a square grey felt patch for the stovetop.
- Cut out four black circles (approx. 7–10 cm in diameter) for the burners.
- Stick the felt pieces on top of the shoebox using hot glue.
Tip: No felt? Use colored paper instead—it’s easier to cut and works just as well.

- Glue the milk carton caps to the front side of the box, just below the burners.
- These become your turning knobs.
-
Use cardboard strips to divide the inside of the box into compartments. These are perfect for organising tiny utensils and play food.
And that’s it—your mini play kitchen is ready!

Our Kitchen had 2–3 wooden skewers on one side of the box for hanging mini spoons, forks, or ladles. (But you can ignore it. My daughter threw it after a few days.
Tips & Customisation Ideas
-
Don’t have a plain shoebox? Wrap it in craft paper, or let your child paint it for a personal touch.
-
Add labels or stickers to mimic a microwave, oven dials, or temperature displays.
This tiny kitchen can be placed on a shelf and pulled out when it’s playtime—so practical and fun!
About a year after we made this DIY version, we finally bought the IKEA DUKTIG play kitchen—and it’s been a huge hit! It was absolutely worth the investment.
That said, we still keep our little cardboard kitchen around. It now doubles as a storage box, and sometimes she still enjoys using it for pretend cooking.

Whether you go for a store-bought set or build your own, play kitchens offer endless opportunities for pretend play—a key part of early childhood development.
Did this post inspire you to make a mini kitchen for your child? I’d love to hear about it in the comments!
Don’t forget to Pin this idea so you can find it later, and share it with a friend who loves DIY kids’ crafts.
Similar Cardboard Ideas for Kids
